
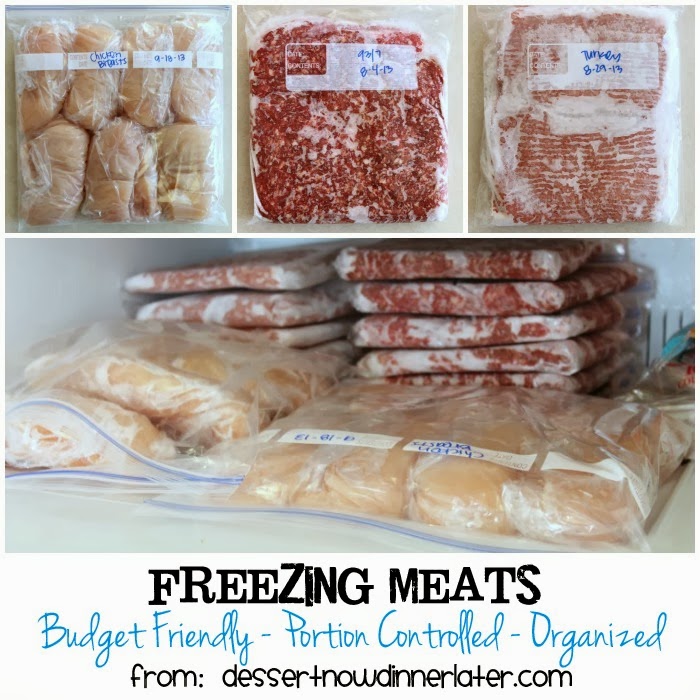
Freezing Meats
I have another budget friendly kitchen tip for you all today. We are talking about freezing meats.
I ALWAYS buy meat on sale. I cringe if I ever run out & have to buy more at regular price. I like to spend about $2 or less per pound for most of my meats, especially chicken & ground beef. Pork is usually cheaper too.
So tip number one is buy in bulk on sale! Family size packages are the best deals anyway, but when you see the price has dropped between $1.99-$2.25/lb it’s time to stock up.
Save This recipe
Enter your email below to get a link to this recipe emailed straight to you to save later! Plus be signed up for all new recipes.
Now that you have bought all that chicken & beef & such what do you do with it? We’ll start with chicken.
Chicken
Frozen chicken breasts seem to be more expensive per pound & they are almost always huge, which means you are eating way more than the proper serving size of 4oz.
I always buy FRESH chicken breasts. I actually prefer to purchase mine from Walmart. They seem to be trimmed the best compared to Sam’s Club or Smith’s (Kroger), so even if I have to pay like $2.09/lb I am still saving money from all the fat & trimming that I have to throw out because they hide it under the chicken in the other brands’ packages.
Even so, you will have to do a little bit of trimming, but buying pre-trimmed breasts is going to cost you way more.
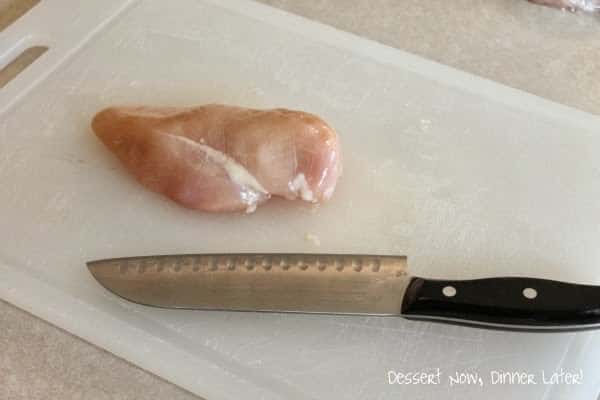
Now that you have trimmed your chicken breast, I like to cut mine in half width-wise to create 2 chicken breasts out of the one original breast.
You are basically butterflying your breast, but cutting the whole way through. This helps with portion control, especially when the chicken breasts are huge. I even try to buy the smaller ones. Your chicken breasts will be smaller if you buy natural/organic chicken, but we simply buy the hormone injected chicken; it’s gross to think about, I know, so let’s move on.
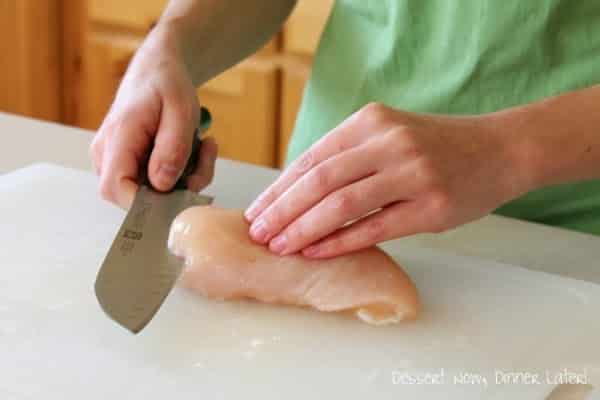
Cutting the chicken width-wise, like this, helps us use less meat in our meals as well, so it stretches farther between purchases. Also, when you are cutting, make sure your knife is sharp & you don’t saw the knife back & forth. Use swift, swiping motions & pull up on the top part of the chicken as you cut across the length of the breast.
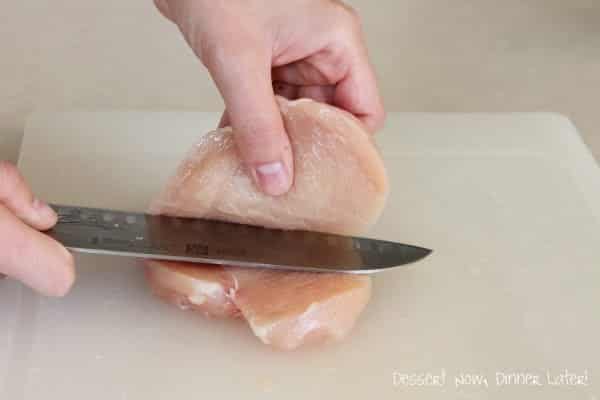
So now that you have two chicken breasts from the one original breast, you are going to stack them back on top of each other, but remember that there are two there when you go to use it from the freezer. Keep your portions small.
One portion of chicken or any meat should be similar to a deck of cards or equal to 4oz. which is why we are making two servings out of one chicken breast.

Wash your hands. Then, using a regular fold-top sandwich bag that has been flipped inside out, grab the chicken breast & fold the bag around it – trapping the chicken breast inside the sandwich bag. You should be able to do this without getting your hands contaminated if you bought smaller breasts.
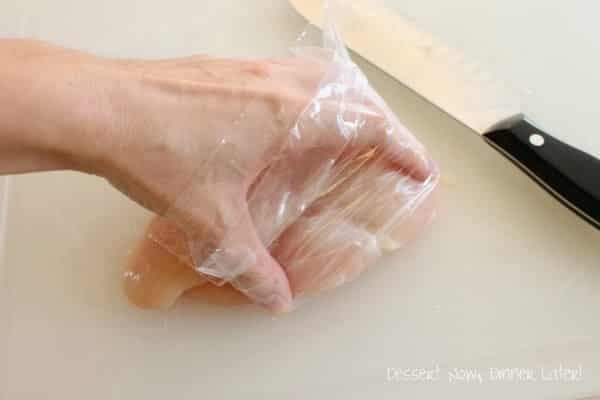
Repeat with all of the chicken breasts.
My method: I will trim one breast & cut it in half width-wise, set it on the other end of my large cutting board & repeat those steps with all of the chicken breasts. Then, I will wash my hands & fold the chicken breasts in the sandwich bags. Make sure you have a system down so you can move quickly & efficiently.
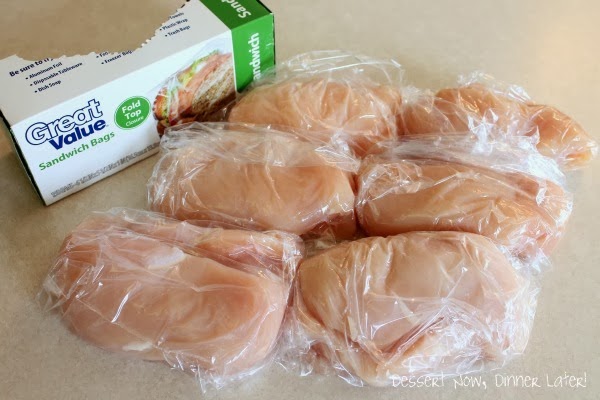
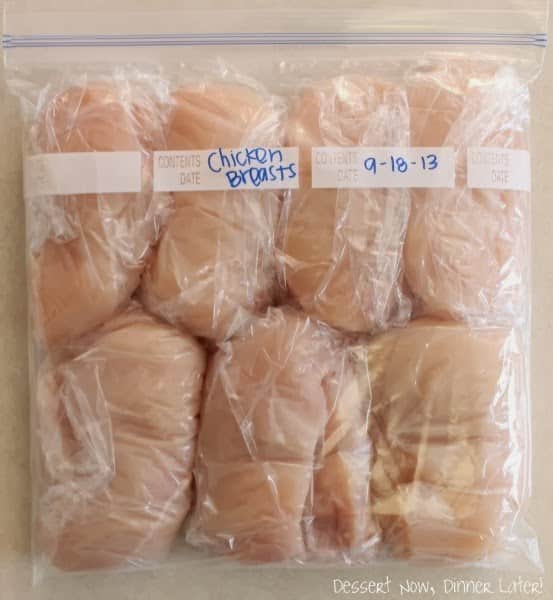
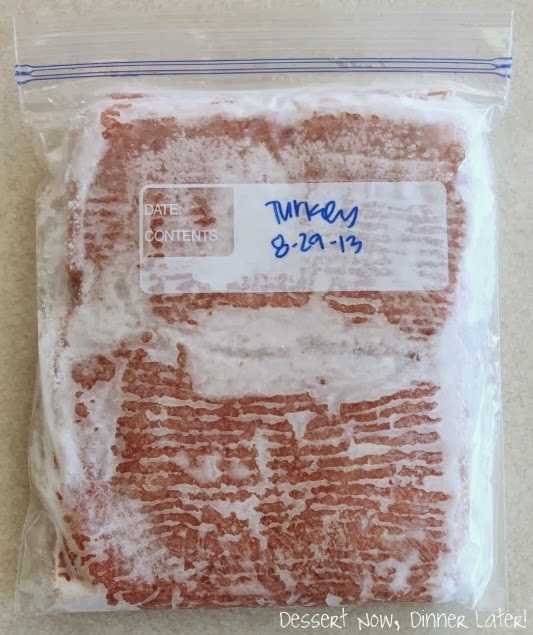
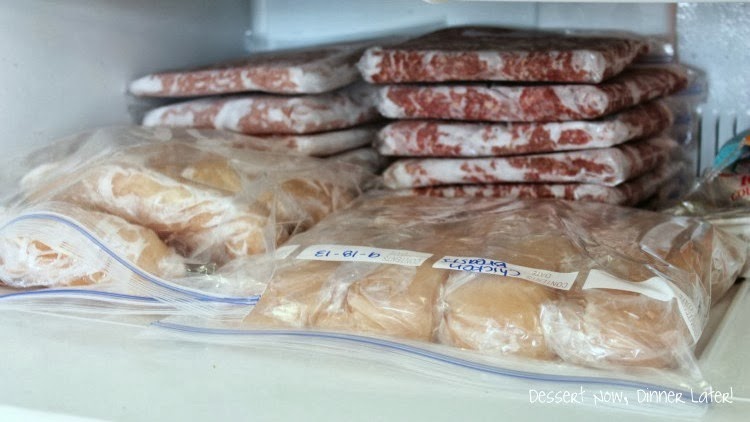
The very last step is to LABEL & DATE a gallon sized zip-top bag. I use regular gallon bags (not freezer bags), but I am efficient with rotating my meat, so it rarely gets freezer burnt.
Lay the individually wrapped chicken breasts into the bag & freeze it flat in the freezer. When you need the chicken you can pull out however many breasts you need & thaw them on a plate, with the sandwich bag on, in the fridge overnight, or in the microwave directly before cooking. Remember to separate the two pieces of the chicken breast before cooking.
Ground Beef
My method for ground beef or ground turkey is the same. I buy it in bulk (about 5-10lbs at a time. Then I use my kitchen scale to weigh approximately 1lb each & press it flat into a quart sized zip-top bag.
I rarely use freezer bags because I feel like it is a waste of money, but I rotate my meat very well & I have organized meal plans. If you are the unorganized or forgetful type, buy the freezer bags.
Also one thing to note about freezing your meat this way, is to not handle it too much. You don’t want your meat being tough from being squished like crazy. Just press it enough to lay it flat in the freezer, squeeze out any excess air & seal the bag shut. LABEL your bags clearly BEFORE you fill them.
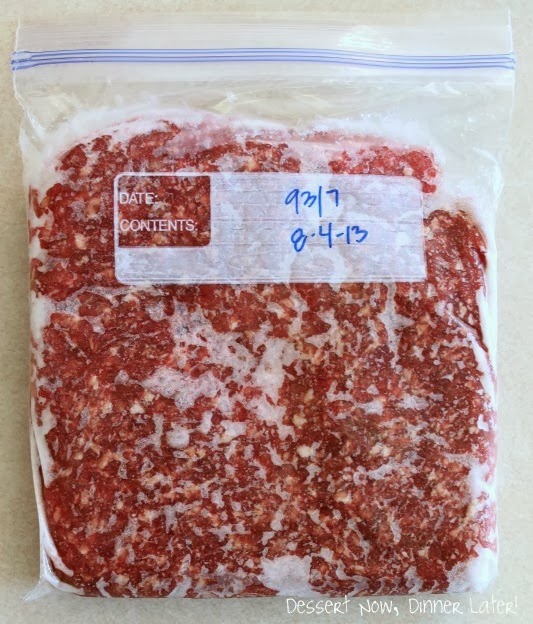
Your meat should last about 6 months this way with little to no freezer burn as long as you squeeze out as much air as you can before sealing your bag shut.
My turkey looks very crystalized in this picture, but it’s not freezer burned yet. This is because there is naturally more moisture in ground turkey breast than ground beef. When you need one of these for dinner, you can thaw it in the fridge overnight on a plate or thaw in the microwave directly before cooking.
Well, those are my tips for freezing meats! Your freezer will look so organized & will fit a lot more meats this way. Saving you money since you are buying on sale & using better portion control. Plus, if you can see what you have in your freezer, it makes dinner planning that much easier!


Helpful post!
These are great tips! I hate how expensive meat is. I try to buy a little bit more when it’s on sale too, but maybe I should do that more often. And I totally agree with Walmart chicken! Just pinned!
I’ve been waiting for this post ever since you said you were doing it! Can’t wait to try out all these tips. Pinned!
Such great tips! I’m totally going to start splitting my breasts in half! Thanks and pinned!
oooh pinned for after Halloween I need to do this
Great, now we can eat more chicken! I hate trimming frozen chicken, I think the fresh will be much better. Thanks!
I loved the suggestions. I am actually going to buy chicken on sale today 🙂 I’m going to try out your tip and cut the meat in half before freezing it. Pinned
Awesome tips! I need to do this. It would definitely make things easier in my life! Pinned!
Great tips! I pinned this!