All Butter Pie Crust
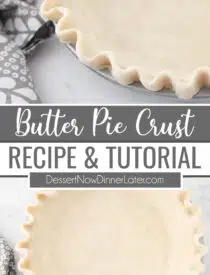
This flaky all butter pie crust tastes great in fruit pies, cream pies, or even savory pot pies. Step-by-step photos show you how to make this easy pie dough. Use this recipe for all your favorite pies.
Bakery Pies
When I worked in a large bakery, we would make up to 100 pie crusts by hand in ONE day. That’s A LOT of pastry crust!
We would use a bench scraper to cut up the butter and we’d roll out the pie dough with a sheeter machine. It was one of the tasks I didn’t mind because it reminded me of making pie with my mom every year for Thanksgiving. One of my favorite memories.
Save This recipe
Enter your email below to get a link to this recipe emailed straight to you to save later! Plus be signed up for all new recipes.
All Butter Pie Crust
We only made butter pie crust in the bakery. Also known as Pâte Brisée. It is classic, simple, and tastes the best.
The pie crust technique I’m going to teach you, is how I was taught to make an all butter pie crust in culinary school. Which is also how we did it in the bakery, just at a much larger scale.
NOTE: I still prefer my Crisco pie crust for an intricate lattice pie crust and other pie crust designs. It’s easier to work with for longer periods of time without risking the fat melting in your hands as quickly; since shortening has a higher melting point than butter. Pie crust made with shortening also holds its shape better. My shortening pie crust recipe uses an egg for added richness so it’s still quite tasty.
Making Pie Crust By Hand vs. Food Processor
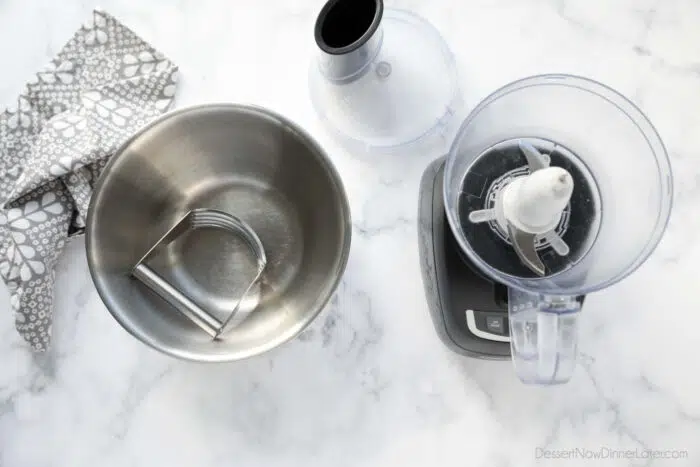
First, let’s talk about equipment. There are two basic equipment options for making pie dough.
Option 1 – You can make pie dough by hand with a bowl and a pastry blender or fork, or by rubbing the butter between your thumb and forefingers.
Option 2 – You can make pie dough in the food processor.
When it comes to equipment for pie crust, I will argue all day that it’s best to do it by hand. You can see, feel and know better when the dough is ready, if it’s made by hand.
Is it easiest? No. But it’s less-likely to be overworked.
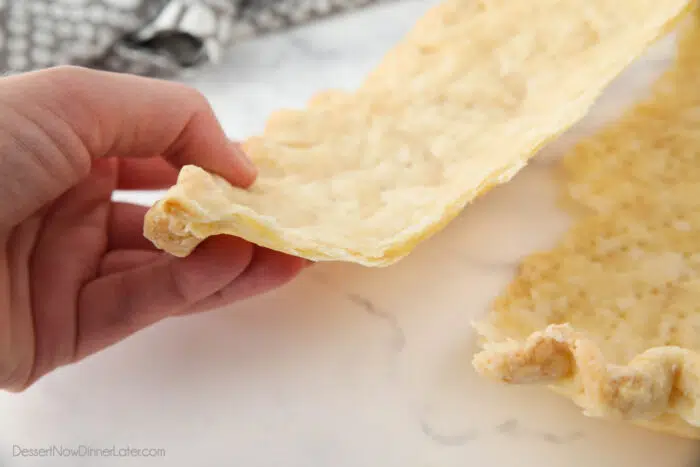
If you cut the butter too small and run the food processor too long, you may end up with a crumbly and/or tough pastry dough, instead of a tender and flaky pie crust. (You want to see those layers in the picture below.)
NOTE: Some people swear by grating the butter with a box grater. I find that grating the butter requires more physical effort. Plus the butter gets very soft in warm hands while it’s being grated. Additional chill time is needed immediately after grating the butter (before adding any water), so it doesn’t melt into the pie dough completely before it goes in the oven. It’s not my favorite method, but can work with a few extra steps.
Ingredients
Now that you’ve got your equipment ready, all you need for this flaky pie crust recipe is:
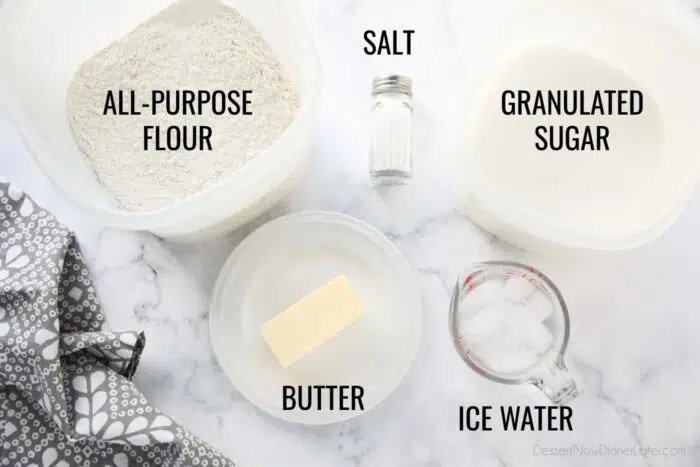
- All-Purpose Flour – Creates the structure of the pie crust.
- Salt – Brings out the flavor. Regular table salt works great.
- Granulated Sugar – Can be left out completely, or increased slightly. Keep in mind pie crust is not meant to be sweet, but the sugar does help with creating a golden crust.
- Unsalted Butter – Adds flavor and creates flaky layers. Salted butter varies in salt content by brand. It’s best to use unsalted butter and add salt to control the final flavor. (If you do use salted butter, you can cut the additional salt in half or omit it completely from the recipe.) Butter must be COLD, and used straight from the fridge for the best flaky layers.
- Why do you need cold butter for pie crust? Butter has a high volume of water content, and this water converts to steam as the pie dough bakes. The steam separates the crust into multiple flaky layers, so it’s important that it doesn’t melt until inside the oven, during baking, otherwise you’ll have a hard, crunchy, and even greasy crust.
- Ice Cold Water – Brings the dough together. You want this to be very cold to help the butter stay firm.
PRO TIP: Chill all ingredients and equipment in the fridge or freezer prior to making the pie dough for added protection. (Seriously! Just measure the flour, salt, and sugar into a bowl and place the whole bowl in the fridge with the butter and ice water. You can even chill the pastry blender or other tools.)

How to Make Butter Pie Crust (Pâte Brisée)
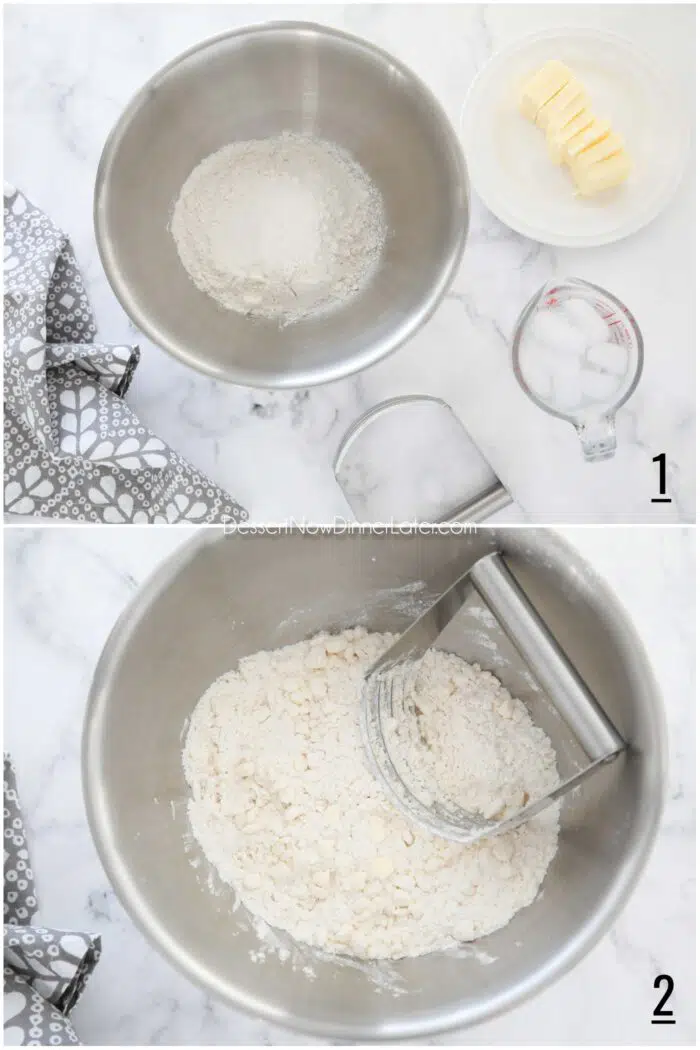
- Mix flour, salt, and sugar together in a large bowl. Cut butter into Tablespoons and add to flour.
- Cut butter into flour using a pastry blender until mixture resembles petite pea-size pieces with some course crumbs. (Don’t cut the butter into all crumbs, or the crust will be crumbly instead of flaky.)
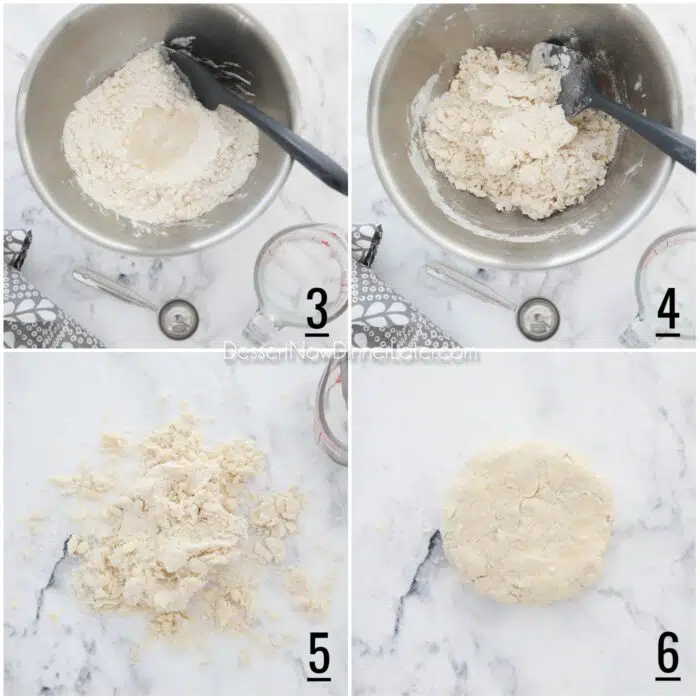
- Add 2-3 Tablespoons of ice cold water.
- Stir together with a spatula.
- Empty mixture onto the countertop and press/squeeze dough together.
- Add extra ice cold water 1 Tablespoon at a time (usually only 1-2 Tablespoons more) pressing and squeezing until dough just comes together. Do not over-mix. Flatten dough into a round disk. Wrap tightly in plastic wrap and refrigerate for 1 hour before using.
NOTE: Adding too much water, and kneading the dough too long can lead to too much gluten formation, which in turn leads to a leathery or tough crust.
Chilling and Freezing Pie Crust
Chilling the pie dough is imperative, as it relaxes the gluten and allows the liquid to absorb, which will result in less cracks, rips, and tears. Refrigeration also gives the butter time to firm back up.
Chill pie dough for a minimum of 30 minutes. You can keep pie dough refrigerated up to 3 days. After that it must be baked or discarded.
PRO TIP: If the pie crust has been chilled for longer than 1 hour, allow the pie crust sit out at room temperature just long enough to take the chill off before rolling it out. (About 10 minutes.) This will help to prevent cracks.
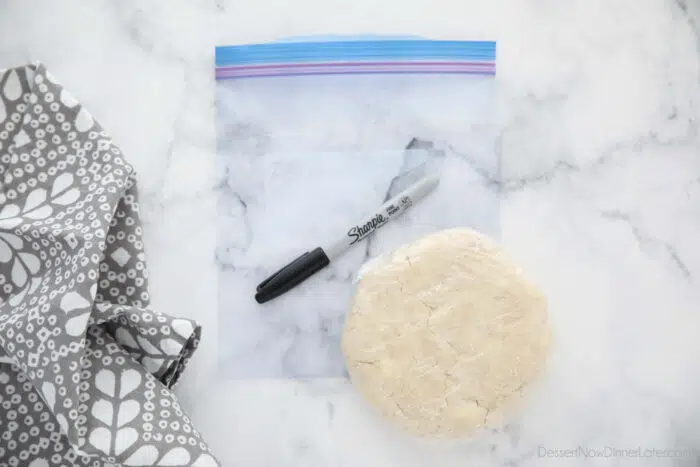
Pie crust can also be made ahead and frozen. Shape pie dough into a flat disk and double-wrap it in plastic wrap, then freeze it. You can place the wrapped pie crust in a freezer bag for added protection. Be sure to label the pie dough with the date.
Freeze pie crust up to 3 months. Allow pie crust to thaw in the refrigerator overnight before using.
How to Roll Pie Crust
After the pie crust has chilled you can roll it out.
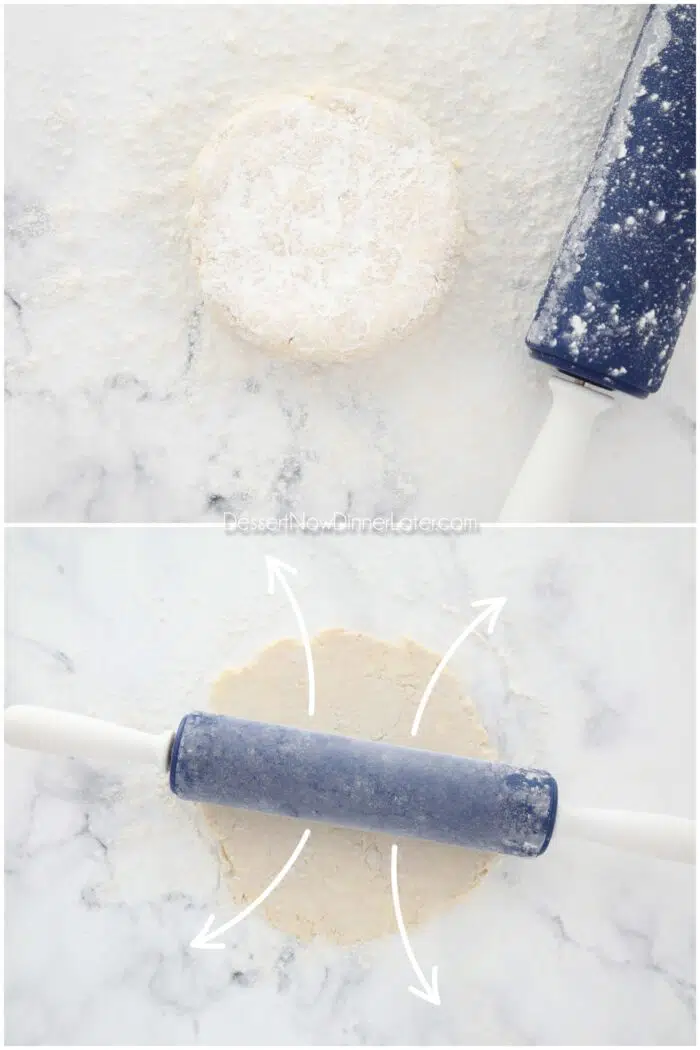
- Sprinkle flour over countertop, rolling pin, and pie crust.
- Use your knuckles to press the edges of the dough to prevent cracking when you roll it out.
- Begin rolling the crust from the center outwards in all directions. Rotating the crust after every few rolls to prevent sticking. Add extra flour as needed.
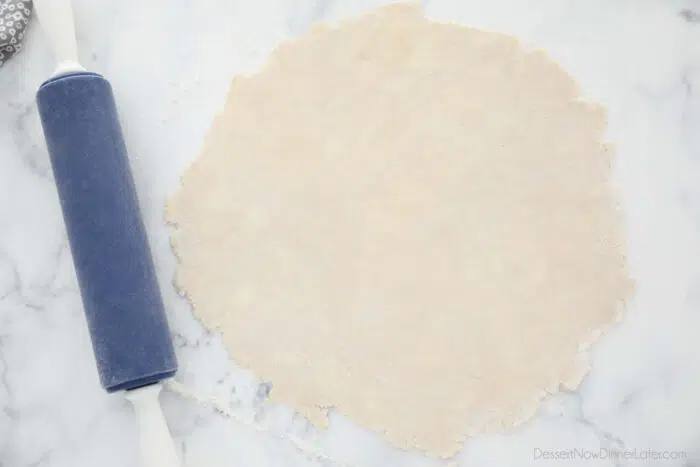
- Continue rolling and rotating the crust until the dough is about 1/8-inch thick, and about 14-inches round.
PRO TIP: Flip the dough over before it gets too big, and roll on both sides to help smooth any cracks.
FYI: You should be able to see little bits of butter throughout the dough. It will look semi-marbled after it’s been rolled out. These flecks of butter will turn into pockets of air, creating flaky layers in the crust as it bakes.
How to Transfer Pie Dough to Pan
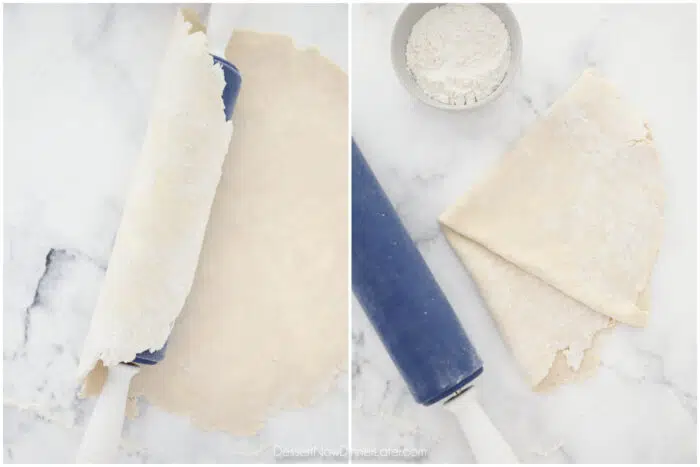
After the crust has been rolled out, there are a couple ways to transfer the dough to the pie pan.
- Roll the pie dough around the rolling pin, then slowly unroll the pie dough into the pie pan.
- Gently fold the pie dough into fourths. (Fold in half, then fold in half again.) Lift the pie dough, place it in the pie pan, and carefully unfold the dough.
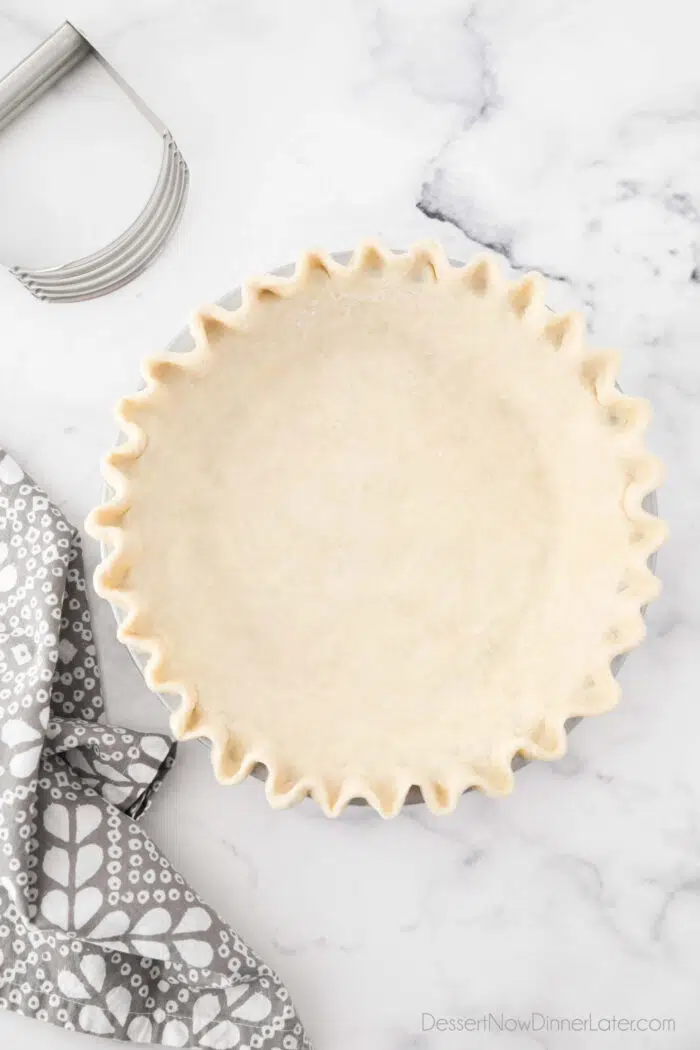
Shaping the Crust
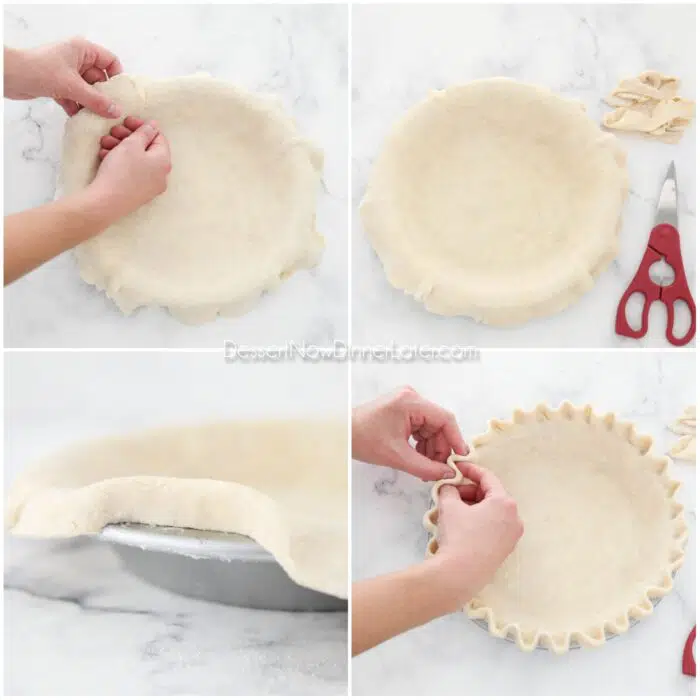
Once the pie dough is in the pan it should be fitted snuggly along the bottom and edges.
- Use one hand to lift the edge of the crust up as the other hand’s knuckles press the crust down the inner sides of the pie plate to the crevice where the sides meet the bottom.
- Cut off any excess crust leaving about a 1-inch overhang.
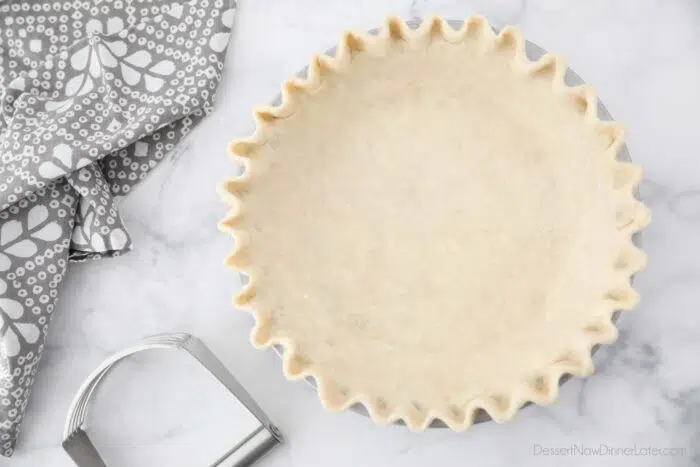
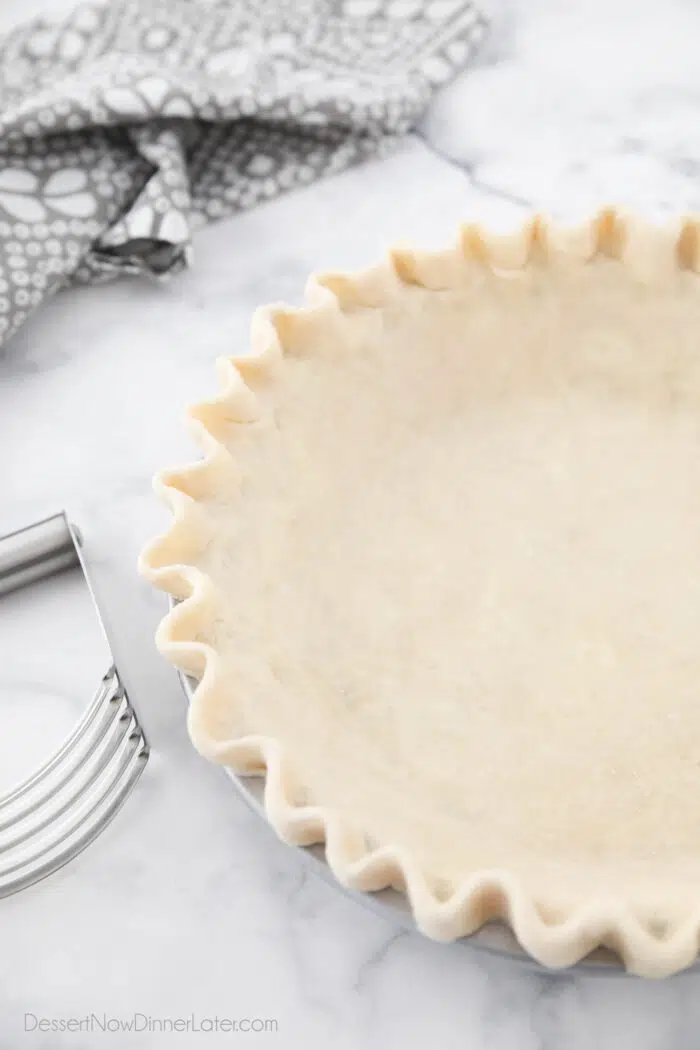
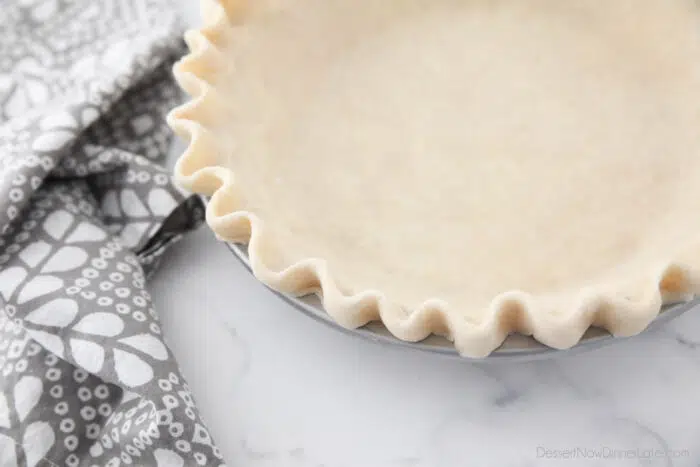
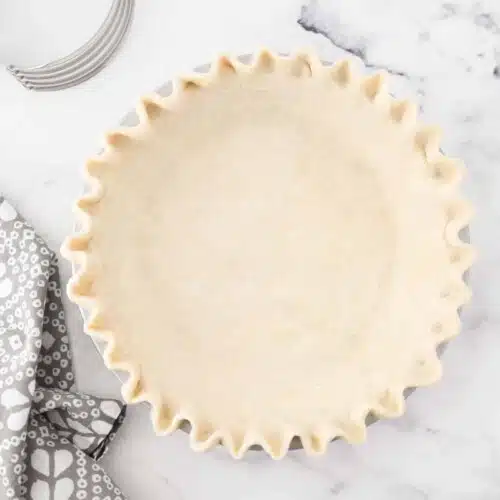
- Fold the overhanging dough underneath and pinch it together to form a rim.
- Use the pointer finger and thumb of both hands to crimp/flute the edges into a wavy ruffle.
NOTE: If the pie crust is getting noticeably warm or soft at this point, you can throw it in the freezer for 5-8 minutes before blind baking the crust or filling it with eggs for quiche.
Single Crust Pie Recipes
Here are some great desserts you can make with this delicious all butter pie crust:
- Chocolate Cream Pie with instant pudding
- Blueberry Cream Cheese Pie
- Cherry Pie with Crumb Topping
- Traditional Dutch Apple Pie Recipe
- Fresh Peach Pie Recipe
- Jello Coconut Cream Pie Recipe
- Blueberry Cream Cheese Crumble Pie
NOTE: For a double crust pie, double this recipe or repeat it. Make sure to give the dough enough time to chill.
All Butter Pie Crust
Ingredients
- 1 ¼ cups (150 g) all-purpose flour
- ½ tsp salt
- ½ tsp granulated sugar
- ½ cup (113 g) unsalted butter, (1 stick)
- 4 Tbsp (+/-) ICE COLD water
Equipment
Instructions
To Make the Pie Crust:
- Mix flour, salt, and sugar together in a large bowl. Cut butter into Tablespoons and add to flour.
- Cut butter into flour using a pastry blender until mixture resembles petite pea-size pieces with some course crumbs. (Don’t cut the butter into all crumbs, or the crust will be crumbly instead of flaky.)
- Add 2-3 Tablespoons of ice cold water.
- Stir together with a spatula.
- Empty mixture onto the countertop and press/squeeze dough together.
- Add extra ice cold water 1 Tablespoon at a time (usually only 1-2 Tablespoons more) pressing and squeezing until dough just comes together. Do not add too much water and do not over-mix. Flatten dough into a round disk. Wrap tightly in plastic wrap and refrigerate for 1 hour before using.
To Roll the Pie Crust:
- Sprinkle flour over countertop, rolling pin, and pie crust.
- Use your knuckles to press the edges of the dough to prevent cracking when you roll it out.
- Begin rolling the crust from the center outwards in all directions. Rotating the crust after every few rolls to prevent sticking. Add extra flour as needed.
- Continue rolling and rotating the crust until the dough is about 1/8-inch thick, and about 14-inches round. (Flip the dough over before it gets too big, and roll on both sides to help smooth any cracks.)
- Carefully roll the pie dough around the rolling pin, then slowly unroll the pie dough into a 9-inch standard pie pan.
- Shape crust to pan. Use one hand to lift the edge of the crust up as the other hand’s knuckles press the crust down the inner sides of the pie plate to the crevice where the sides meet the bottom.
- Cut off any excess crust leaving about a 1-inch overhang.
- Fold the overhanging dough underneath and pinch it together to form a rim.
- Use the pointer finger and thumb of both hands to crimp/flute the edges into a wavy ruffle.
- If pie crust seems noticeably warm or soft, chill for 5-8 minutes in the freezer before baking. See instructions for how to blind bake pie crust.
Notes
- MAKE AHEAD OPTION: Wrap crust in pie pan with saran wrap and put in freezer for several hours to overnight. Pull crust 10-20 min before baking; just enough that when you touch the crust it will give a little bit but still be really cold. Don’t thaw crust completely.
- TO FREEZE LONG TERM: Shape pie crust into a flat disk and double wrap with plastic wrap. Label and freeze up to 3 months. Can place in a freezer bag for added protection. THAW in refrigerator overnight before using.
- FOR A DOUBLE CRUST PIE: Double the recipe and divide dough half (making two disks). Ensure enough time to chill dough completely.
- If you are baking a pie with a double crust, you need to cut slits into the top layer and bake the pie at 350˚F for a minimum of 1 hour or until the filling bubbles and the crust is brown. You should notice through the slits in the crust if the filling has bubbled. If your crust is getting overly brown, cover it with foil until the filling bubbles. In my experience it usually takes 1 hour plus 10 to 15 minutes for the filling to bubble and the crust to be completely baked.
Nutrition
Did you make this?
Don’t forget to leave a rating below and make sure to follow on Pinterest and Instagram for more!