
Apple Hand Pies

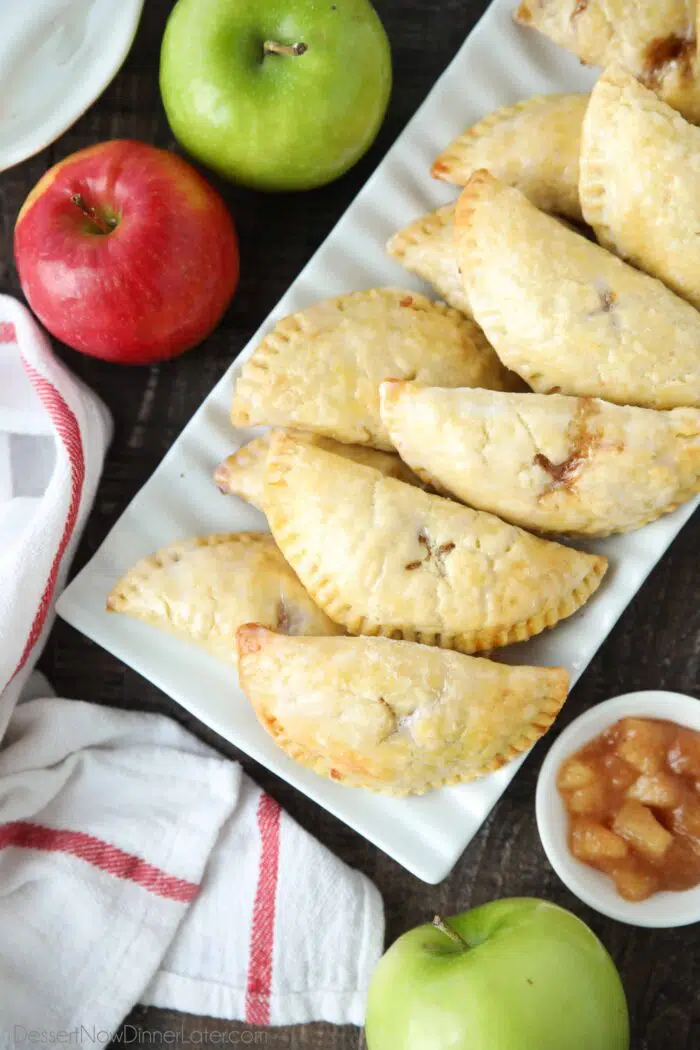
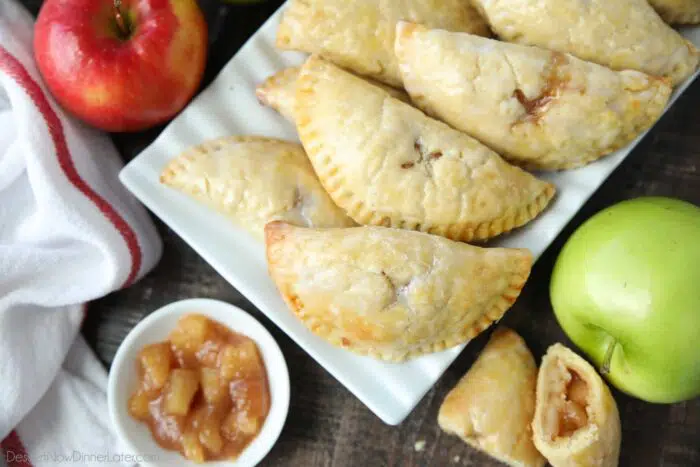
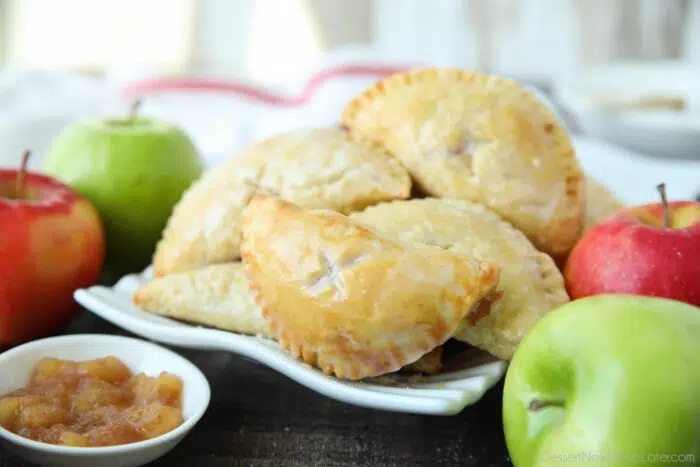
These mini homemade apple hand pies are made with a super flaky pie crust, fresh apple pie filling, and topped with a sweet glaze.
Hand Pies
What are hand pies? Hand pies are a portable pocket pie. The miniature version of a classic pie that you can eat with your hands. Hence the name, “hand pies”.
Although similar looking to a turnover, hand pies are made with pie crust, whereas turnovers are made with puff pastry.
Save This recipe
Enter your email below to get a link to this recipe emailed straight to you to save later! Plus be signed up for all new recipes.
Hand pies are the sweet variation of an empanada, and are typically baked instead of fried, but do what you prefer. You can even make them in the air fryer.
Apple Hand Pies
I took my favorite pioneer woman pie crust, filled it with my homemade apple pie filling, and topped it with a simple powdered sugar glaze to make these baked apple hand pies.
Typically I top my apple pie with cinnamon-sugar, but I wanted to mimic those mini glazed fruit pies you can buy at the store.
You know, those mini pies they typically sell near the checkout stand? As a child I would beg my mom to buy me one whenever we went grocery shopping.
Now that I’m grown, I can make a whole batch of these glazed apple hand pies at home.
Can I use store-bought ingredients?
I’m of the opinion that homemade tastes best, but sometimes you need a time saving alternative.
My recipe below for apple hand pies is completely from scratch, but you may cheat and use store-bought pie crust, and canned apple pie filling for these. You would only have to make the pie glaze, which is a mere two ingredients: powdered sugar and milk (or water).
Regardless of using homemade or store-bought ingredients, I will show you how to assemble these hand pies.

How to Make Apple Hand Pies
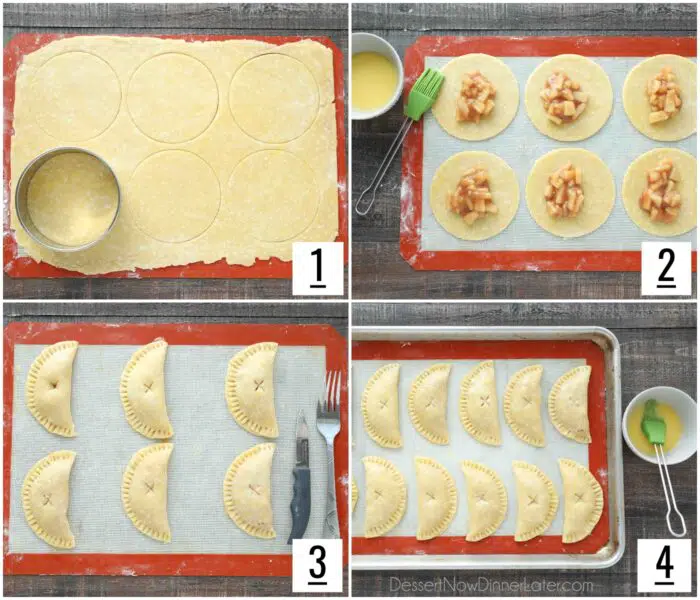
- Roll the pie crust about 1/8-inch thick onto a lightly floured surface. Use a 4.5-inch round cookie cutter to cut circles in the dough. Remove dough scraps and set aside to re-roll.
- Place a heaping Tablespoon of apple pie filling in the center of each circle. Lightly brush the edges with egg wash (1 egg + 1 Tablespoon of water, whisked together). This will be the “glue” to seal the edges. NOTE: A little goes a long way. If there’s too much, the edges will slip instead of stick.
- Fold the pie crust up and over the filling, then stick the edges together. Use a fork to crimp the edges to complete the seal. Then use a knife to cut slits into the top for ventilation (I did an “x”).
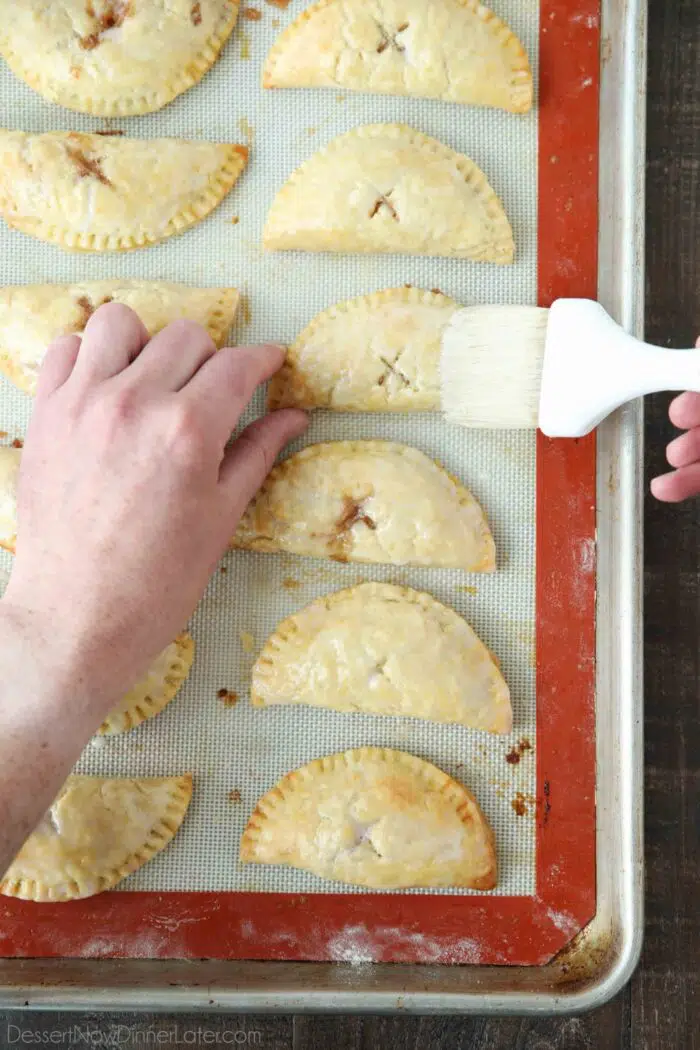
- Repeat process with remaining pie crust and filling. Place hand pies about an inch apart onto a parchment or silicone lined baking sheet. Brush the top of each hand pie with egg wash.
Note: Chances are the pie crust has gotten warm from sitting out and being handled. At this point, you may want to refrigerate/freeze the mini pies for 10-15 minutes before placing them in the oven. Chilling the mini pies will help solidify the fat (butter/shortening) in the pie crust to help keep its shape and create those flaky layers.
Baking and Glazing
- Bake the apple hand pies at 400 degrees Fahrenheit for 20-25 minutes or until the top and bottom have browned.
- Prepare the glaze by mixing powdered sugar and milk (or water) together in a bowl. Brush the top of the apple hand pies with the glaze immediately after removing them from the oven; while still warm. Allow to cool slightly before enjoying.
How to Store Apple Hand Pies
Apple hand pies are best eaten right away. They may be stored in an airtight container at room temperature or in the refrigerator up to 2-3 days. Nuke leftovers in the microwave for 10-20 seconds, if desired.
Can I freeze hand pies?
Fruit filled hand pies freeze better without glaze on top, as the glaze will sweat and dissolve upon thawing. So if you know you won’t be eating them all, it’s best to only glaze the ones you will be consuming. But, it’s up to you.
To freeze, wrap pies individually in plastic wrap. Then place the wrapped pies inside of a freezer safe zip-top bag or airtight container and freeze up to 6 months. Thaw hand pies in the fridge or at room temperature. Alternately, unwrap a frozen hand pie and nuke it in the microwave for 1 minute.
More Apple Dessert Recipes
- Irish Apple Cake
- Apple Fritter Monkey Bread
- Caramel Apple Cheesecake Bars
- Apple Sheet Cake
- Apple Crumble Bars
- How to cut apples for apple crisp (+ Recipe!)
- Apple Fritters

Apple Hand Pies
Ingredients
Pie Crust:
- 3 cups (360 g) all-purpose flour
- 1 tsp salt
- 1 cup (189 g) all-vegetable shortening, (butter flavored or regular)
- 1 large egg
- 1 Tbsp white distilled vinegar
- 5 Tbsp (+) ice cold water
Apple Pie Filling:
- 2 ½ cups (233 g) apples, peeled, cored, and diced (about 2-3 apples)
- 1 Tbsp lemon juice
- ¼ cup (50 g) light brown sugar, packed
- 2 Tbsp granulated sugar
- 1 tsp ground cinnamon
- ⅛ tsp ground nutmeg
- 1 Tbsp (14 g) unsalted butter
- 1 Tbsp corn starch
- ½-¾ cup (118-177 ml) cold water
Glaze:
- ¾ cup (90 g) powdered sugar
- 2 Tbsp milk, (or water)
Additional Ingredients:
- 1 large egg
- 1 Tbsp water
Equipment
Instructions
Pie Crust:
- Combine flour and salt in a large bowl. Stir. Add shortening and cut into small pea-sized pieces with a pastry blender or two forks.
- Add the egg, vinegar and 5 Tablespoons of ice cold water. Mix with your hands. Empty the contents from the bowl onto the counter. Add extra water 1 Tbsp at a time, if needed, until the dough just comes together. (Don't add too much.)
- Divide dough in half and create 2 flat discs. Saran wrap the discs and place them in the fridge/freezer for 15 minutes.
Apple Pie Filling:
- Peel, core, and dice apples. Toss with lemon juice, both sugars, cinnamon, and nutmeg in a large bowl.
- In a medium-size skillet or saucepan over medium heat, melt the butter and add the apples. Cover and cook for 3 minutes.
- Place corn starch in a bowl. Slowly whisk the water into the corn starch. Once combined, add to apples. Continue cooking for an additional 5 minutes, stirring frequently, until apples are fork tender and the sauce is thickened. (*Add more water, if needed, for desired sauce consistency.)
- Cool apple pie filling to at least room temperature before using.
Assembling Hand Pies:
- Preheat oven to 400 degrees Fahrenheit.
- Roll the pie crust about 1/8-inch thick onto a lightly floured surface. Use a 4.5-inch round cookie cutter to cut circles in the dough. Remove scraps and set aside to re-roll.
- Place a heaping Tablespoon of apple pie filling in the center of each circle. Lightly brush the edges with egg wash (1 egg + 1 Tablespoon of water, whisked together). This will be the “glue” to seal the edges. NOTE: A little goes a long way. If there’s too much, the edges will slip instead of stick.
- Fold the pie crust up and over the filling, then stick the edges together. Use a fork to crimp the edges to complete the seal. Then use a knife to cut slits into the top for ventilation (I did an “x”).
- Repeat process with remaining pie crust and filling. Place hand pies about an inch apart onto a parchment or silicone lined baking sheet. Brush the top of each hand pie with egg wash. (Optional, but recommended: Chill pies in fridge/freezer for 10-15 minutes to firm up pie crust before baking.)
- Bake the apple hand pies at 400˚F for 20-25 minutes or until the top and bottom have browned. (Filling may bubble and leak through slits.)
- Prepare the glaze by mixing the powdered sugar and milk (or water) together in a bowl. Brush the top of the apple hand pies with the glaze immediately after removing from the oven; while still warm. Allow to cool slightly before enjoying.
Notes
- Apple hand pies are best eaten right away. They may be stored in an airtight container at room temperature or in the refrigerator up to 2-3 days. Nuke leftovers in the microwave for 10-20 seconds, if desired.
Nutrition
Did you make this?
Don’t forget to leave a rating below and make sure to follow on Pinterest and Instagram for more!


Turned out great! I used store bought filling because that’s what I had, but still great. Also used turbinado sugar instead of the glaze. They disappeared quickly
Glad you were able to make it work with what you have Sydney. Thanks for your review!
Made these. Very good. Used my own pie crust. Important to role out thin or pies taste dry. I made sure filling was not too thick. I used ~1/2 T on each pie crust circle. Topped with a little butter. Baked for ~15 minutes. Cut circles ~3 1/2”.
Looks very good and easy. Approximately how many hand pies does this make?
Thanks! It makes about 18 hand pies.
So good, I’m making them again tonight! Great explanations and followed your tips. Thanks it’s a keeper!
I’m so glad to hear that. Thanks for taking the time to share your experience with the recipe Allison.